Internet Service Provider
WordPress Theme
By itcroc
Thank you for purchasing our Product. In case of any questions or doubts, do not hesitate to contact us via out Themeforest profile . We will do our best to solve any problem concerning the project. At the same time we invite you to visit often our profile on ThemeForest since there will be appearing the improvements of our project and the newest actualization.
Introduction - #back to top
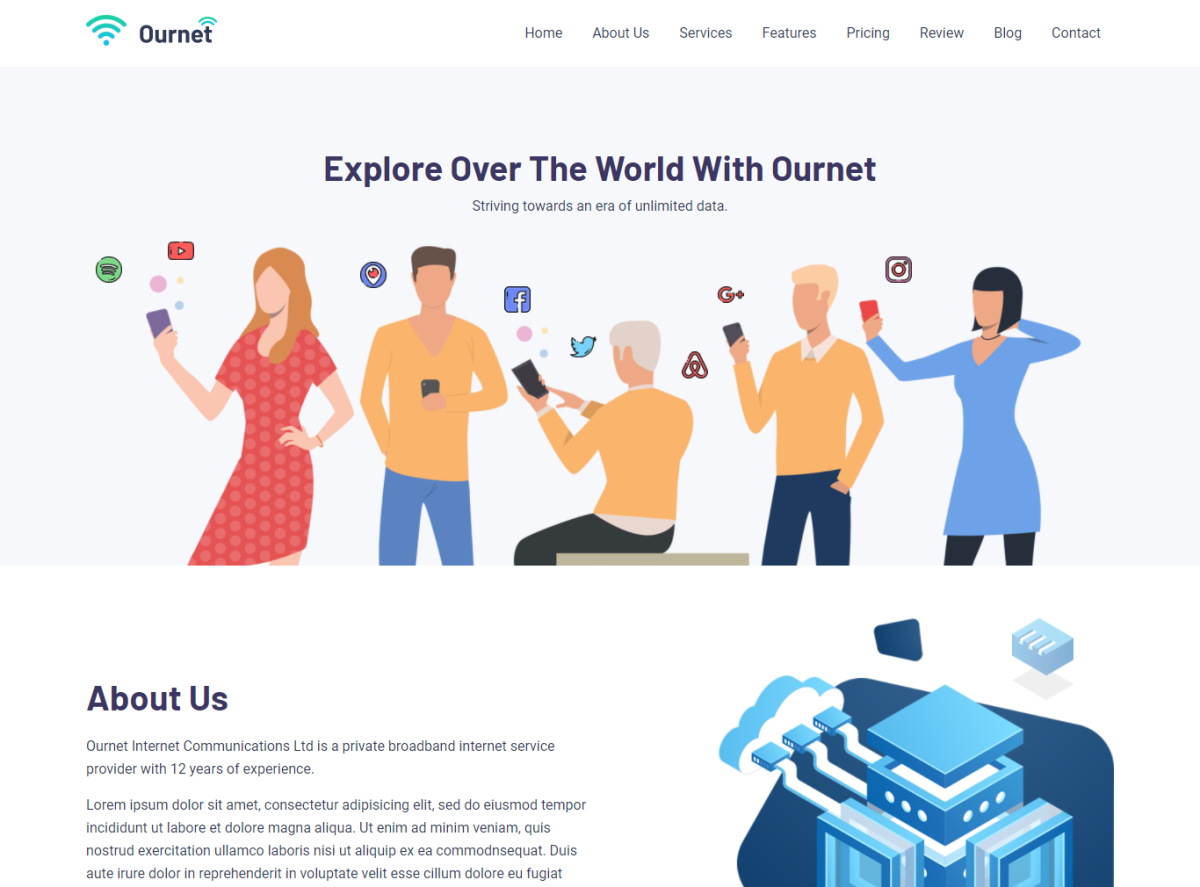
Ournet Step into the future of online connectivity with Ournet – a cutting-edge, mobile-friendly WordPress theme meticulously designed for Internet Service Providers. Whether you’re looking to showcase your ISP services, establish a professional portfolio, offer expert consulting, or drive creativity with a dynamic agency, Ournet has you covered. With its sleek design and powerful features, Ournet empowers you to create a digital presence that stands out in today’s competitive landscape. Seamlessly adapt to the needs of your audience and leave a lasting impression. Experience the next level of web design and functionality with Ournet. Join the ranks of successful ISPs, innovative portfolios, influential consulting firms, and dynamic creative agencies who have already harnessed its potential. Elevate your online presence – start with Ournet today!
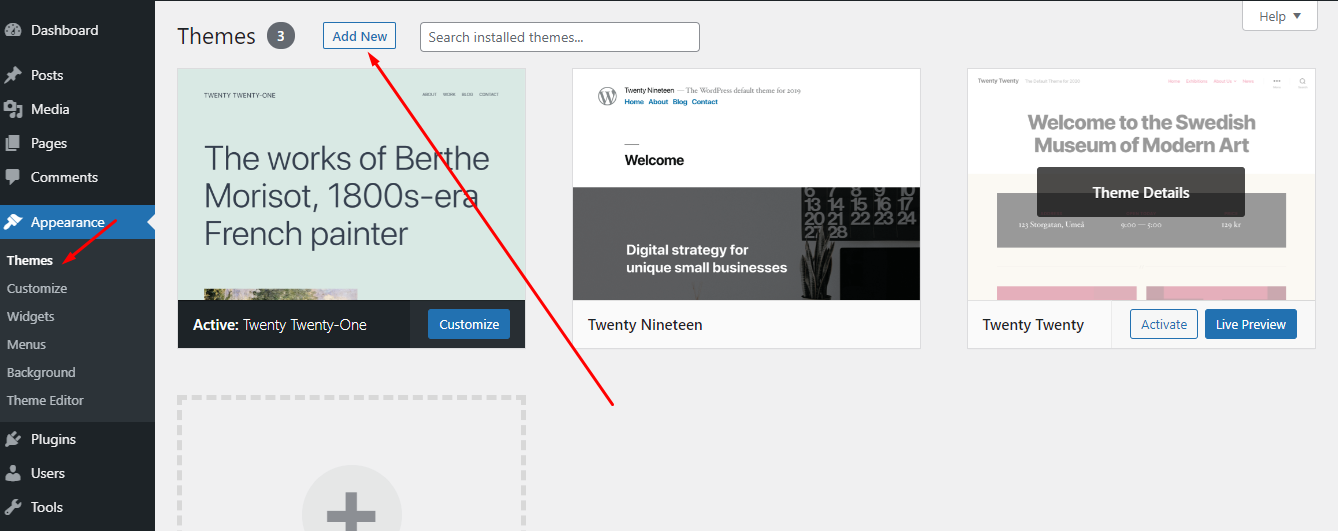
Upload and Activating theme - #back to top
 Step 2
-
Navigate to Appearance → Themes in your WordPress
admin dashboard
-
Click the Add New button at the top of the page then go for the Theme Upload option.
-
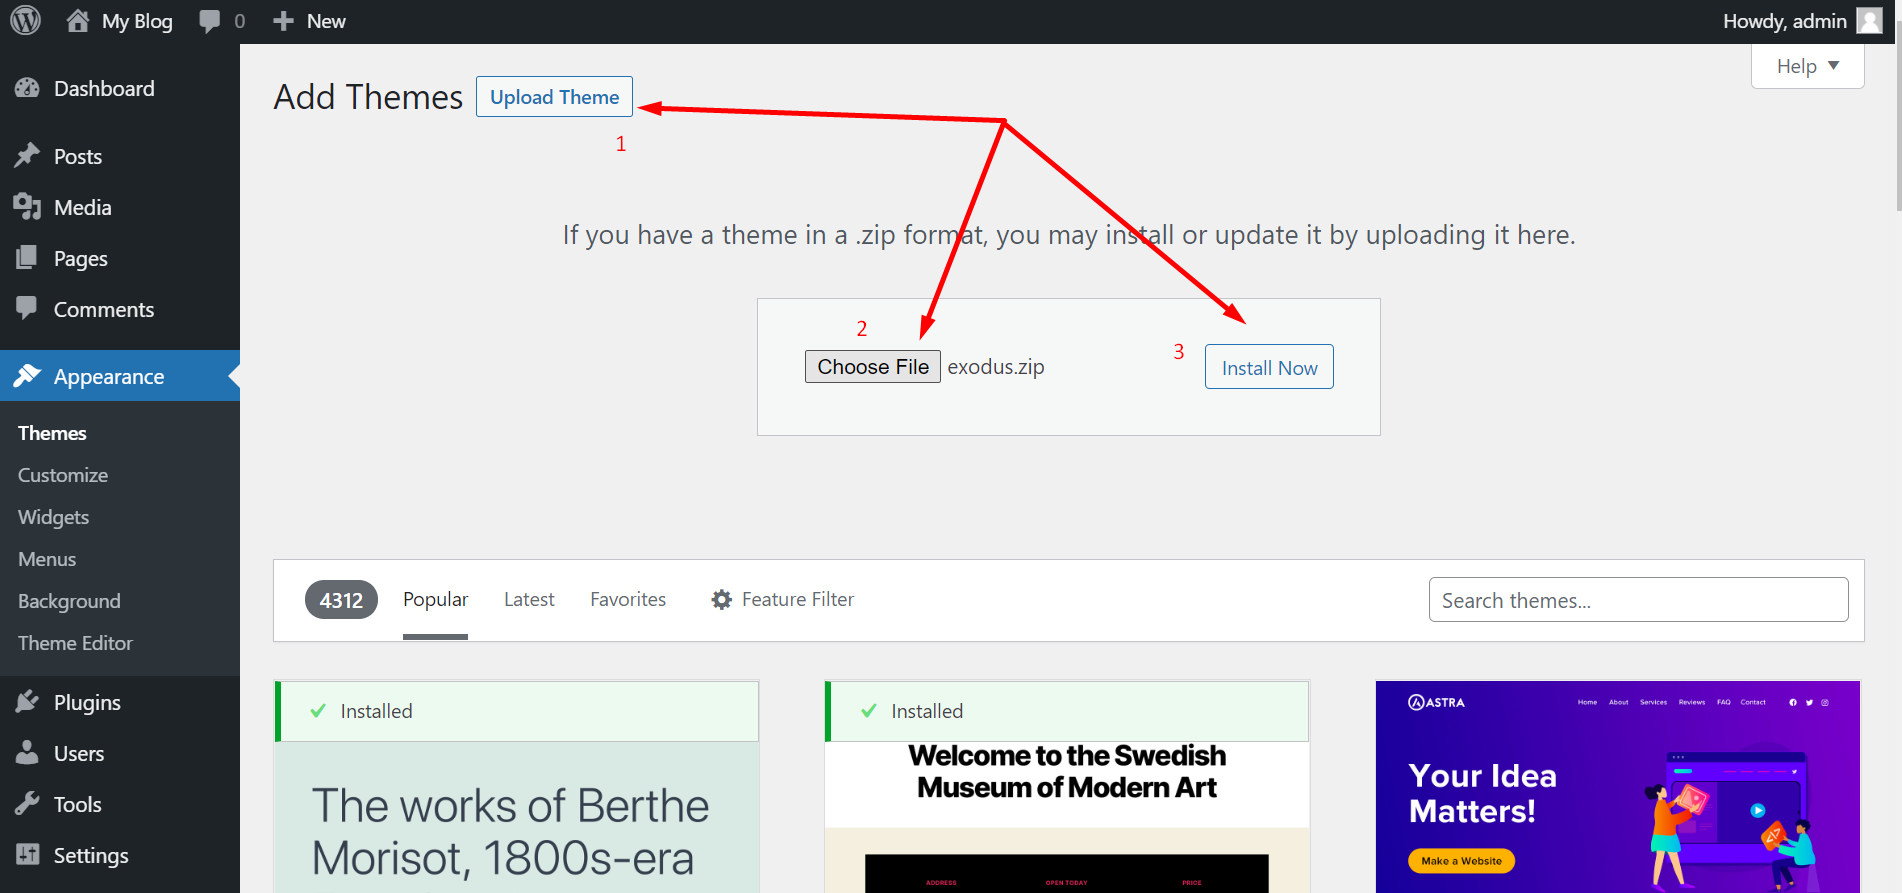
For the file upload, pick Theme Files / Ournet.zip
in the theme package downloaded
-
from ThemeForest and click Install Now.
-
Click Activate once the upload has finished and
you're ready for the next step: Installing the Plugins.
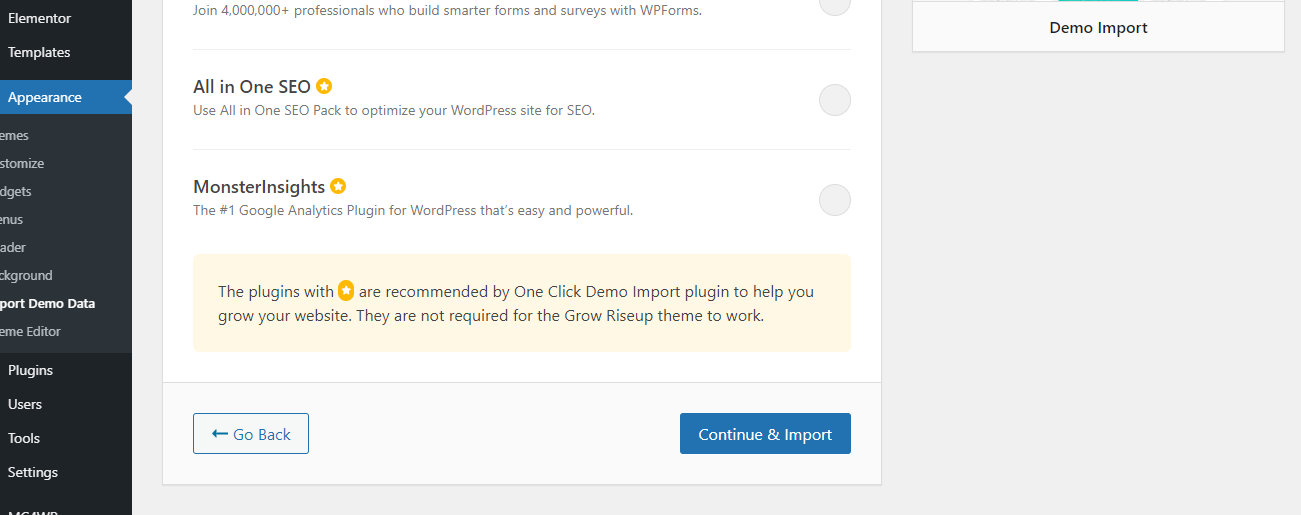
Installing Plugins - #back to top
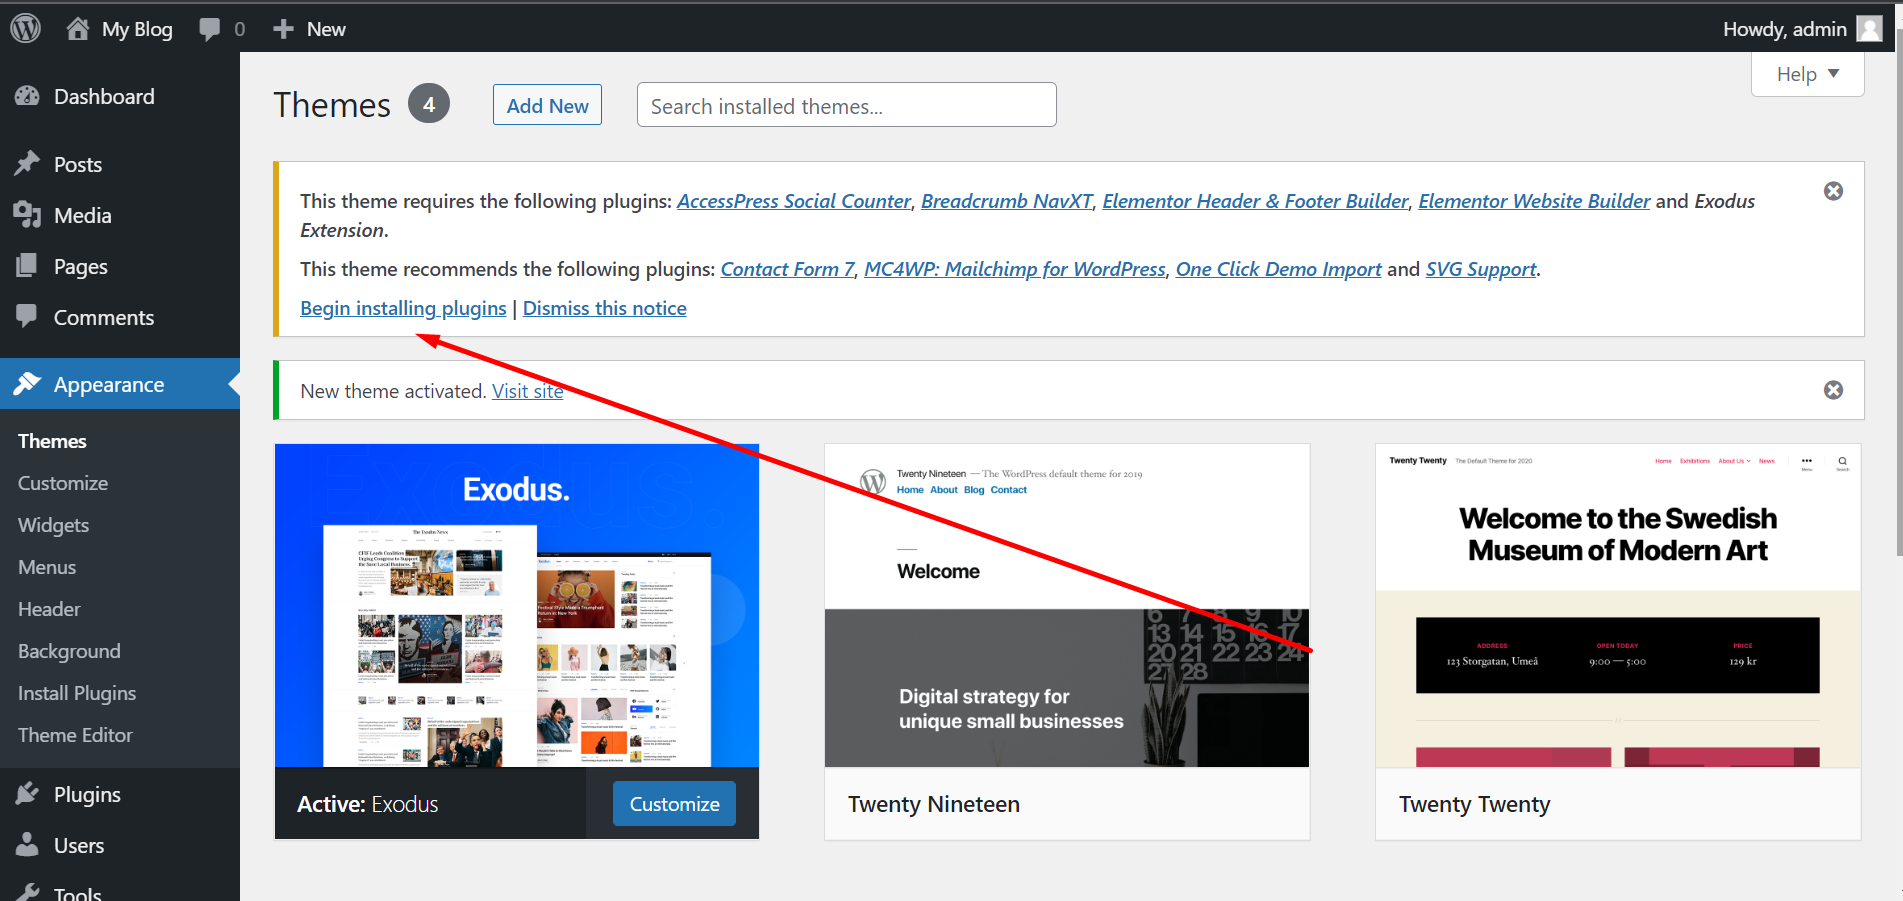
Right after the theme was activated, a notification at the top of the screen will suggest to continue with the installation of the plugins recommended for getting the best our of your theme.
-
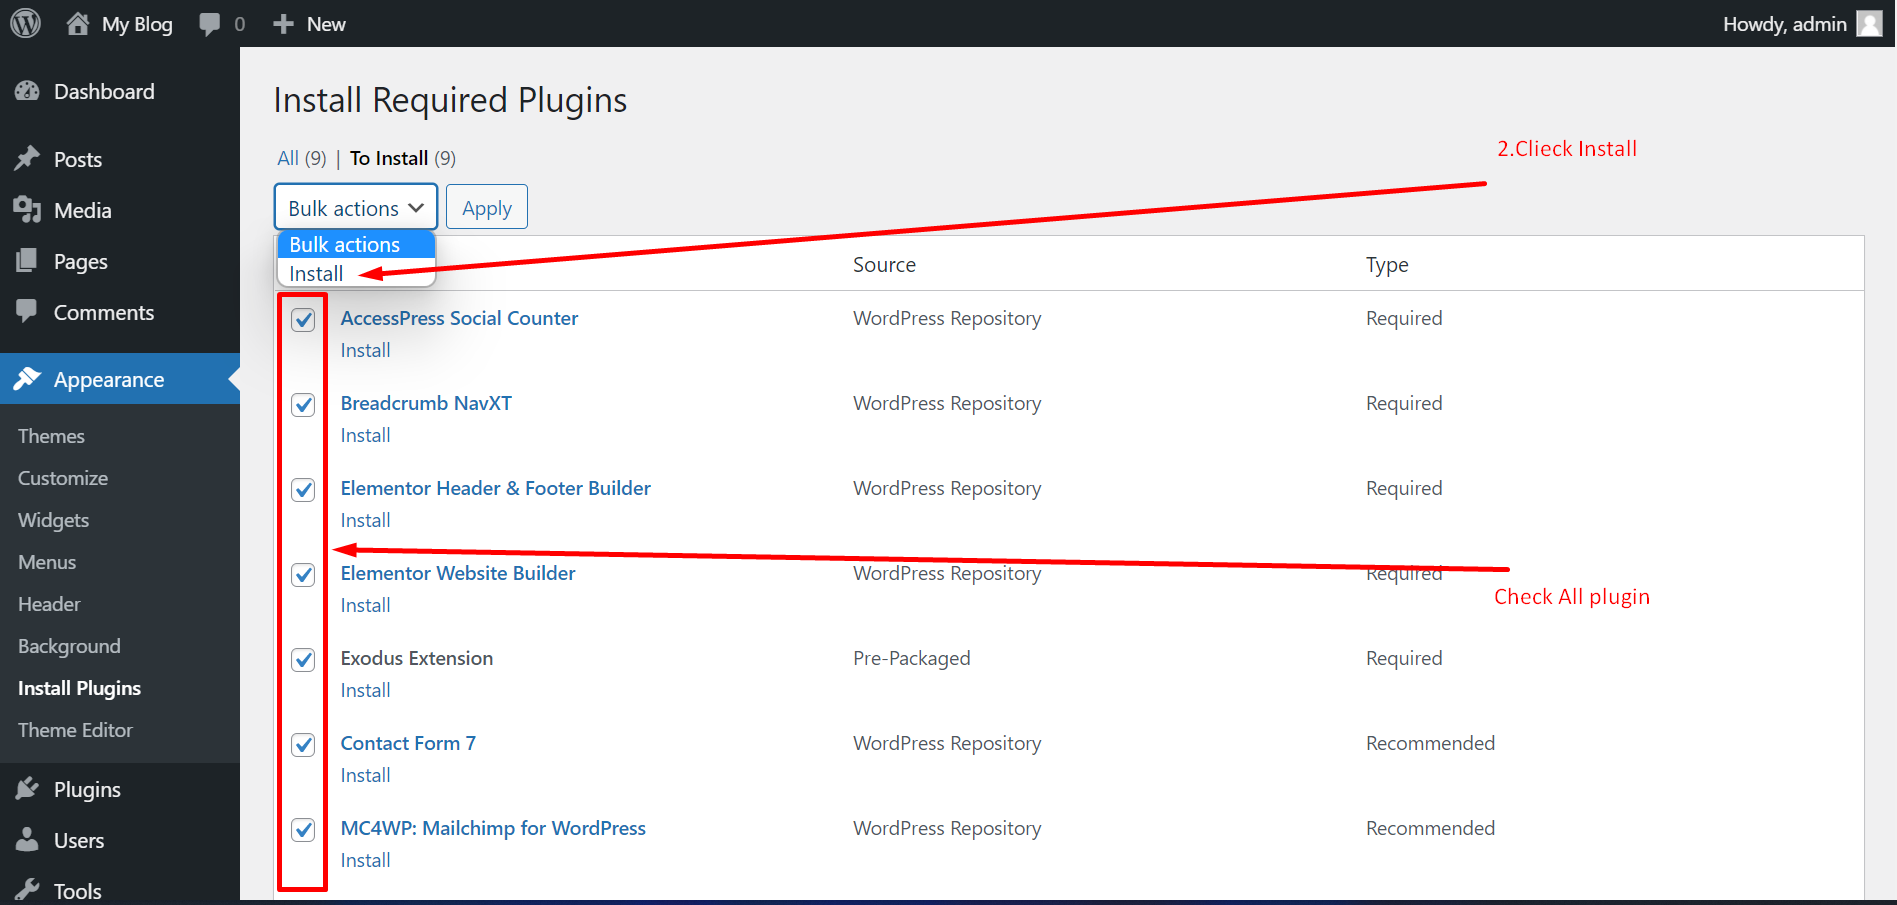
Click 'Begin installing plugins' and select all the
plugins in the list.
-
Check All Plugin
-
Check All Plugins you just need to Click installed.()
-
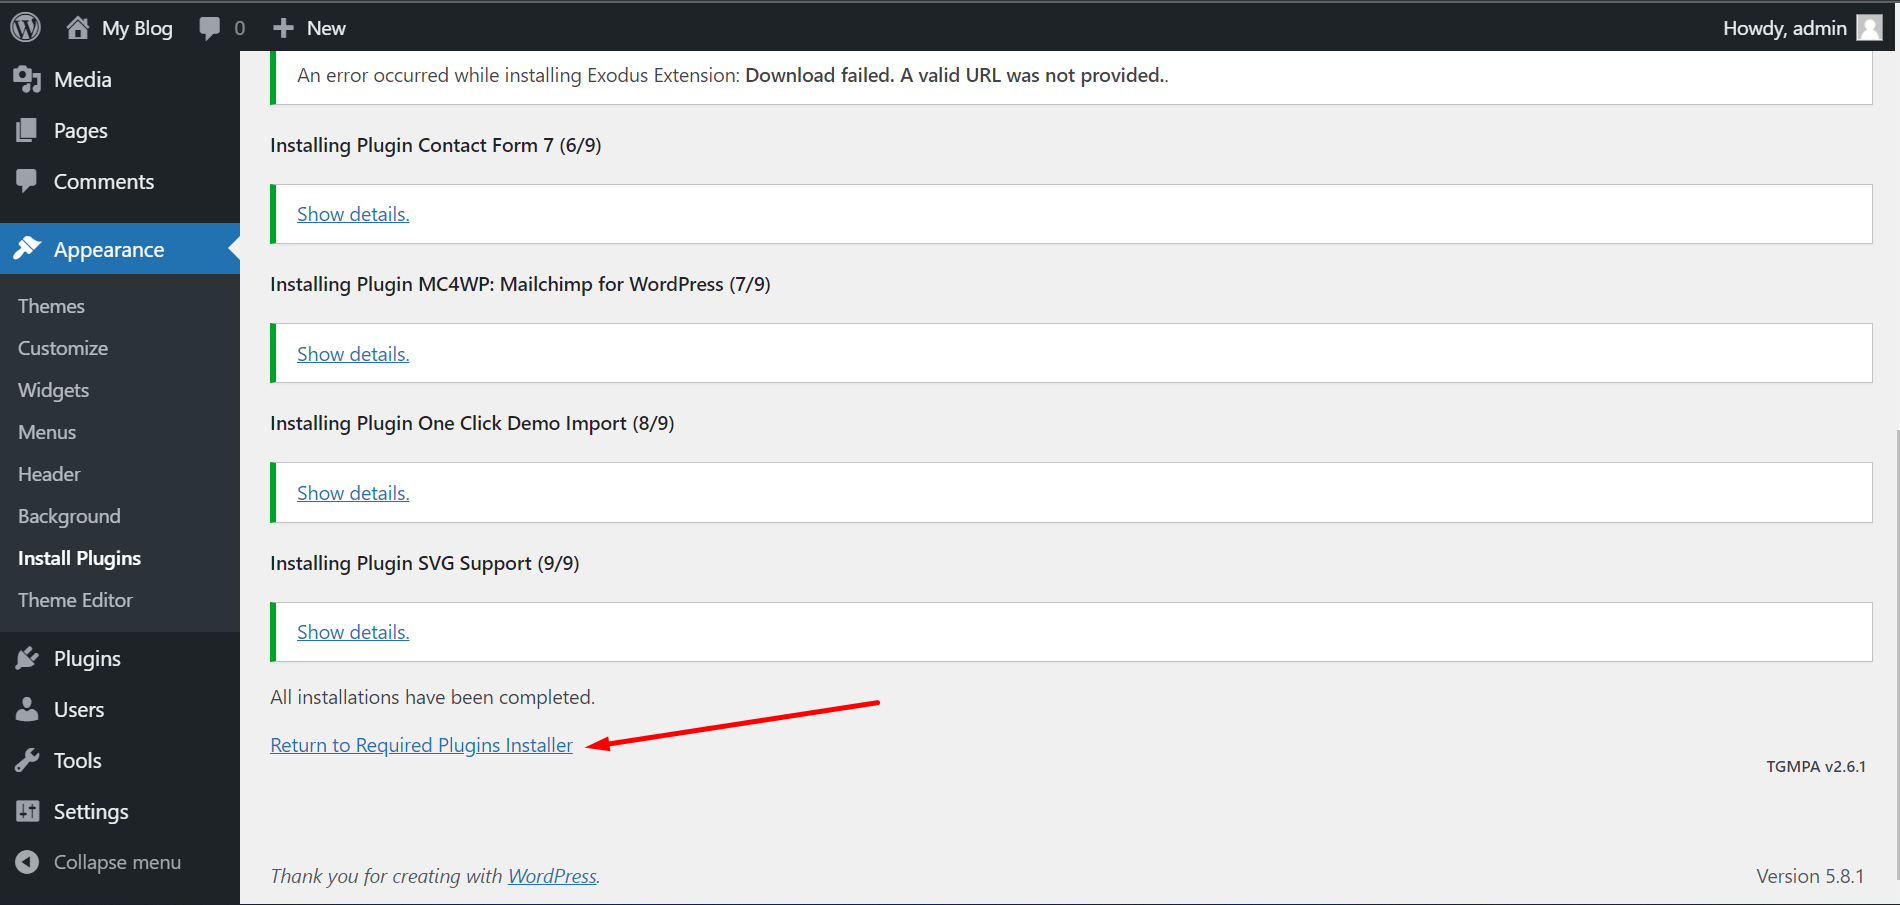
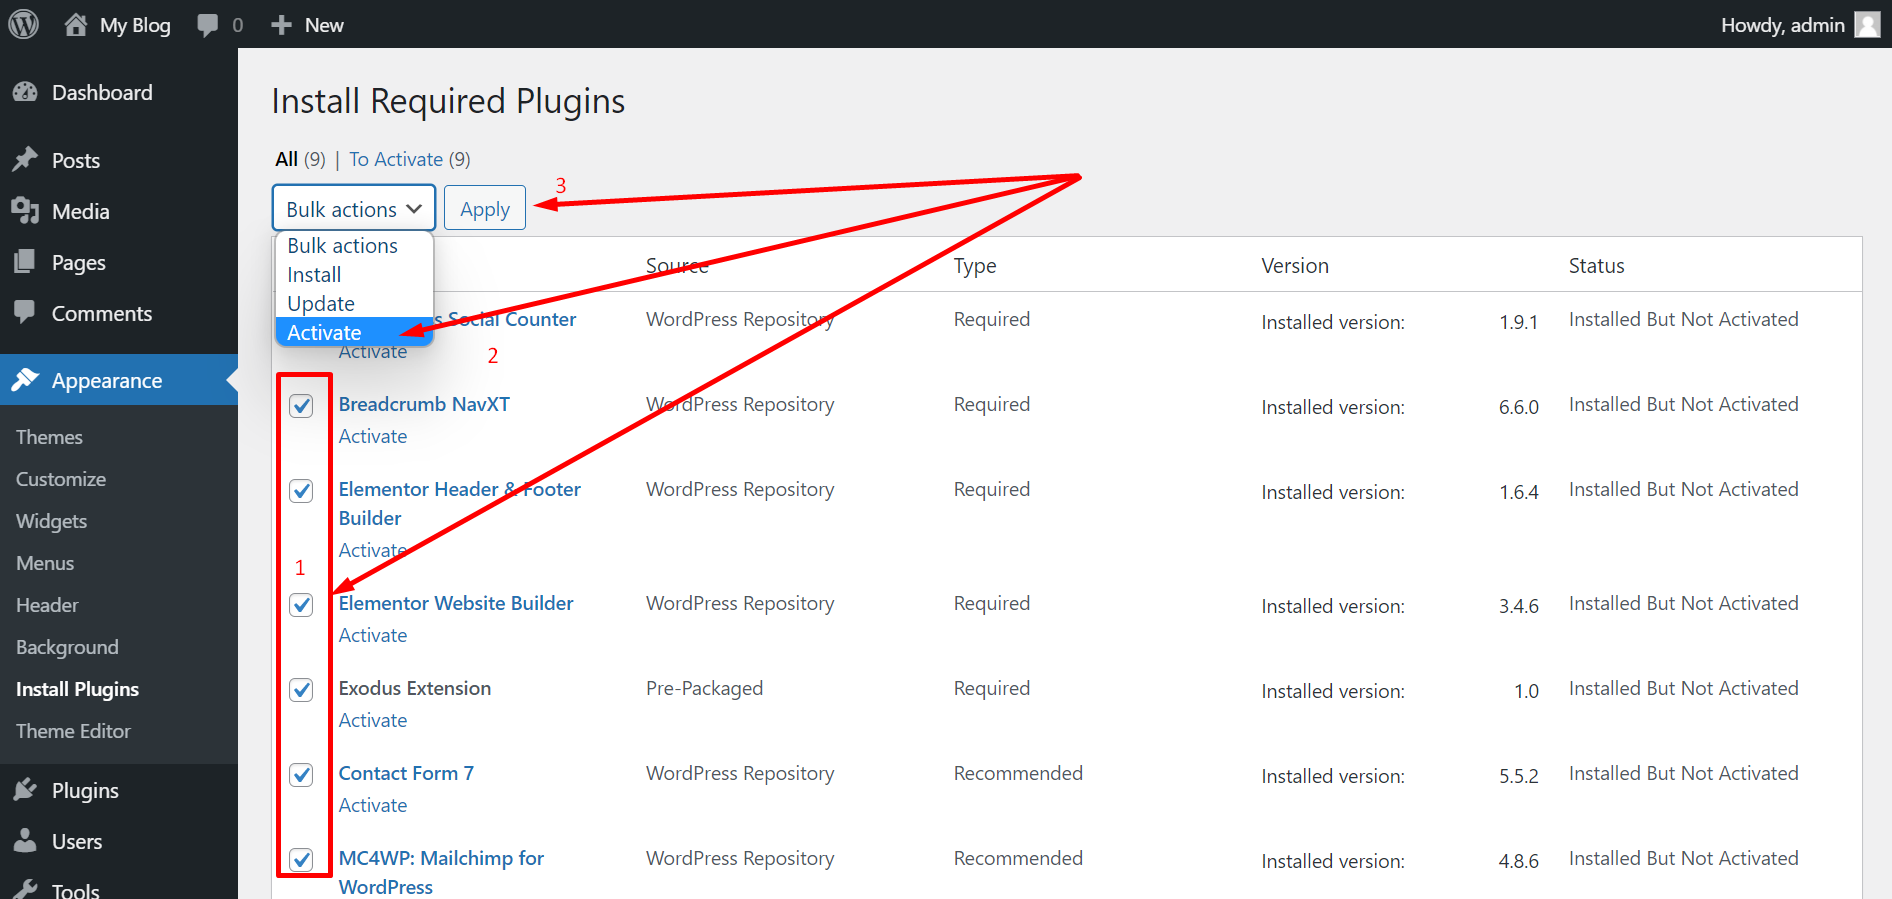
After Complete All plugins Install Now Scroll Bottom And Click Return to Required Plugins Installer Then
Check All Plugins and Click Active
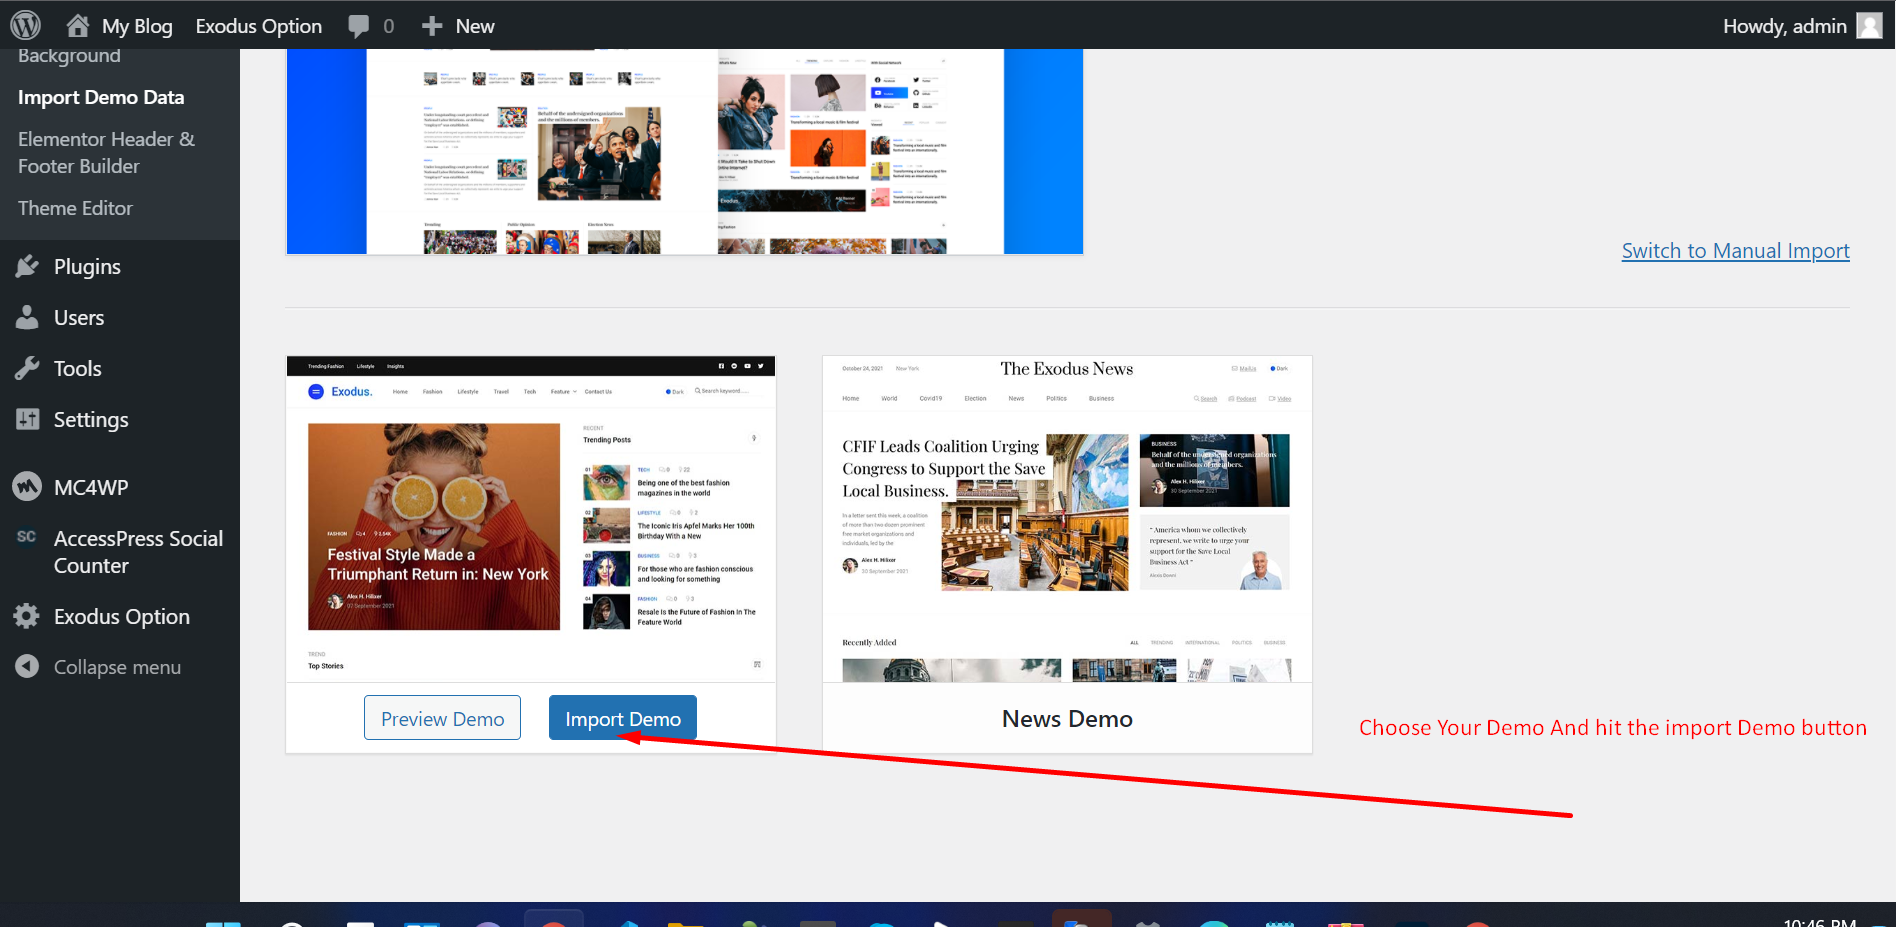
Demo Import - #back to top
Ournet Theme comes with one click demo installation exactly like the original demo.
There's 2 ways of importing demo data.
-
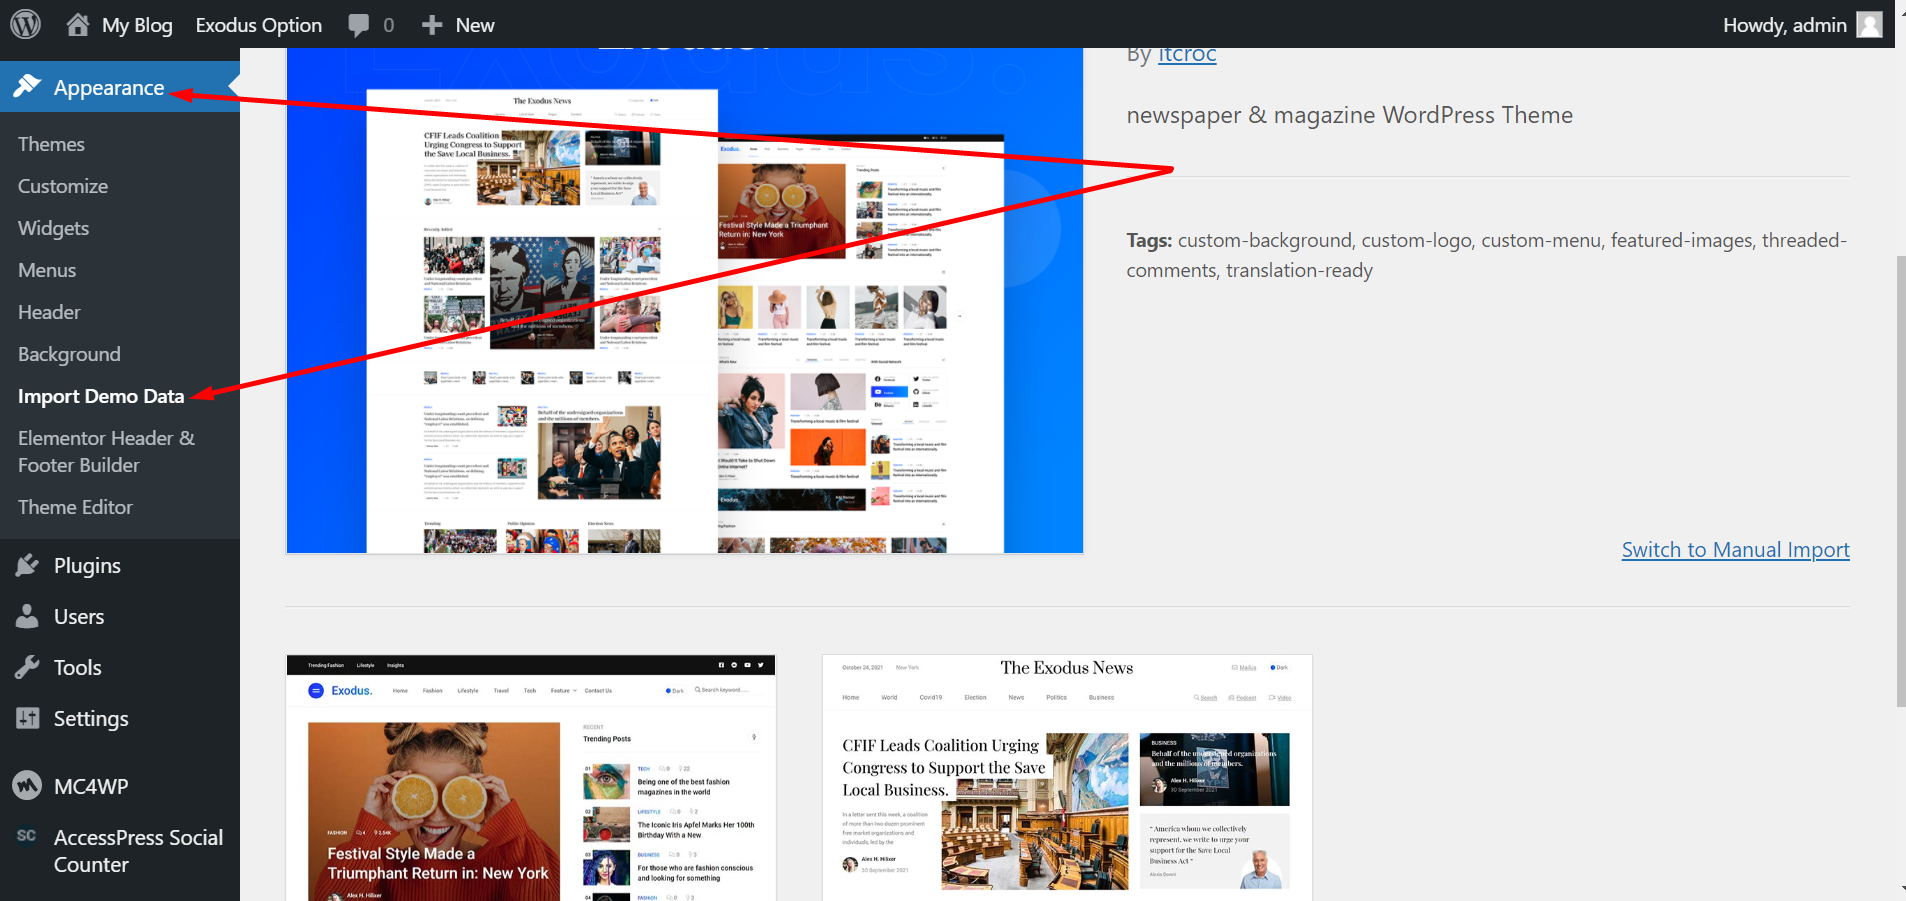
Onc Click demo import.
Just click on Import button and your demo site is ready.
-
Navigate to Appearance → Import Demo Data in your
WordPress admin dashboard
-
Then Click Import Demo Data Button Next Step Click
Continue Button And Import is start. Wait sometime
-

-
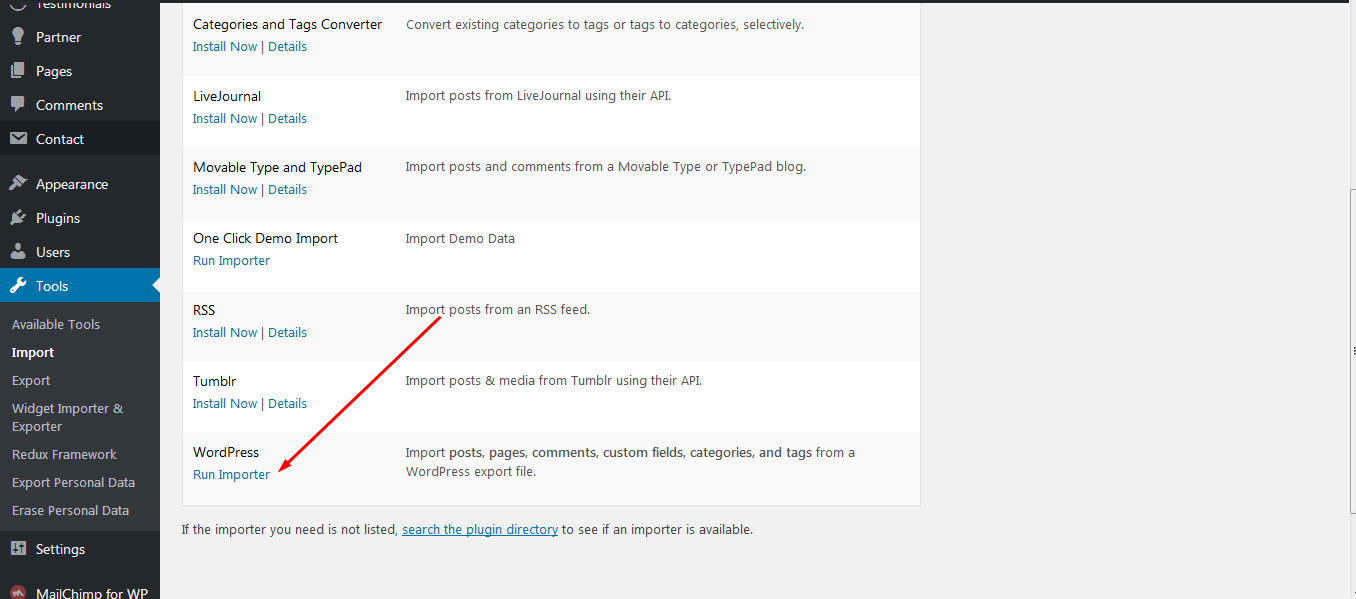
Manual import.
If somehow the One click demo import fails to import your pages then you can try importing demo content manually.
-
In your Wordpress admin dashboard, navigate to
Tools → Import → WordPress.
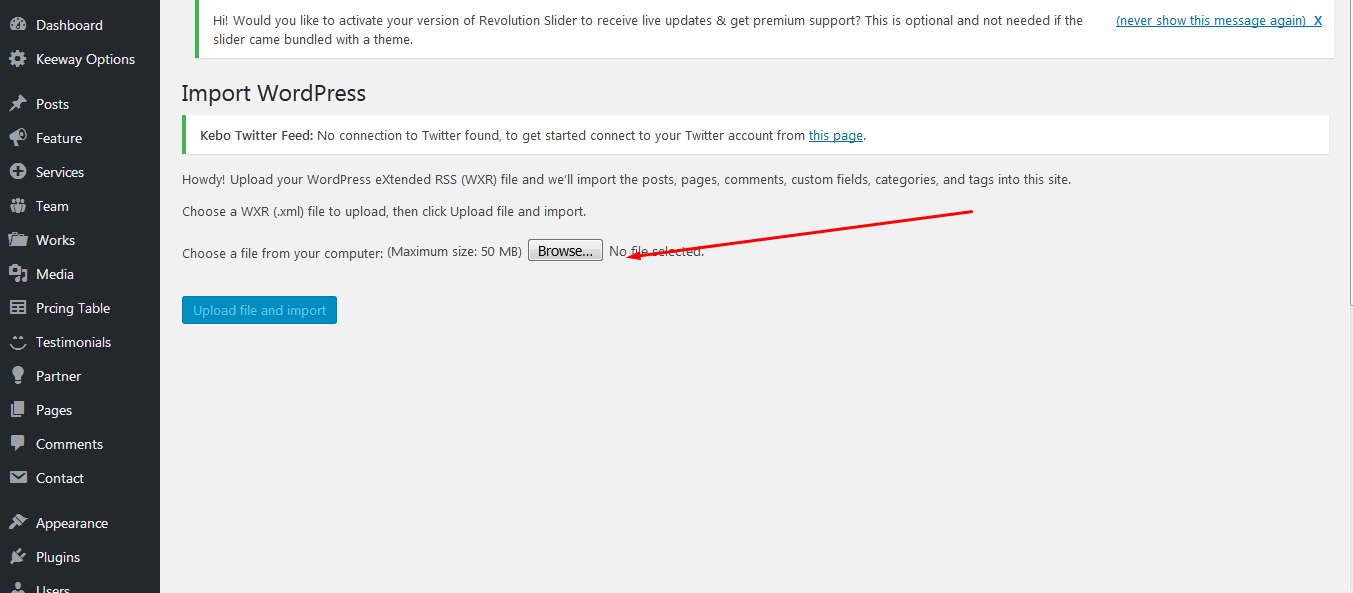
-
Select the theme dummy data .xml file
located in inc\demo\ournet-demo.xml
- Wait until you see the message Have Fun
-
In your Wordpress admin dashboard, navigate to
Tools → Import → WordPress.
Homepage & Blog Setup - #back to top
After importing Demo Data Then Settings your Home Page And Blog Page
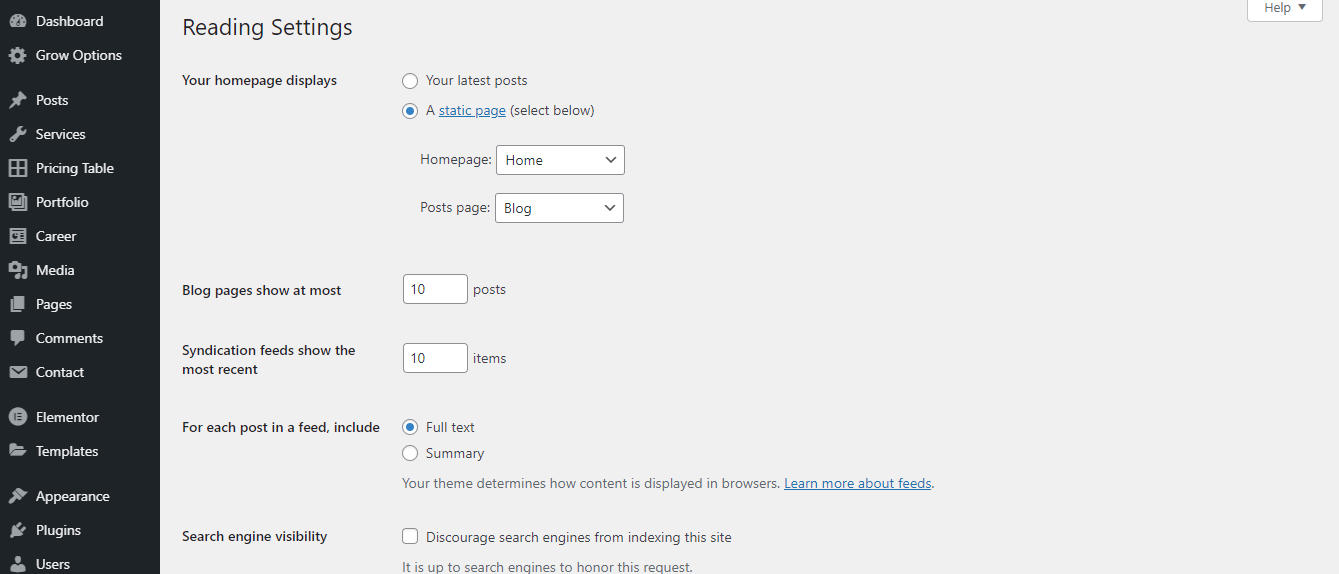
To setup the blog page, in your WordPress admin panel, navigate to Settings → Reading.
Assuming you already have a page named "News", for the
Front page display, select "A static page" and choose
your "News" page as the Posts page. This is what you
should be seeing on your screen from left side.
To setup the home page, in your WordPress admin panel, navigate to Settings → Reading.
Assuming you already have a page named "Home", for the
Front page display, select "A static page" and choose
your "HOME page as the home page. This is what you
should be seeing on your screen from left side.
Menu Setup - #back to top

Step 2
 Step 3
-
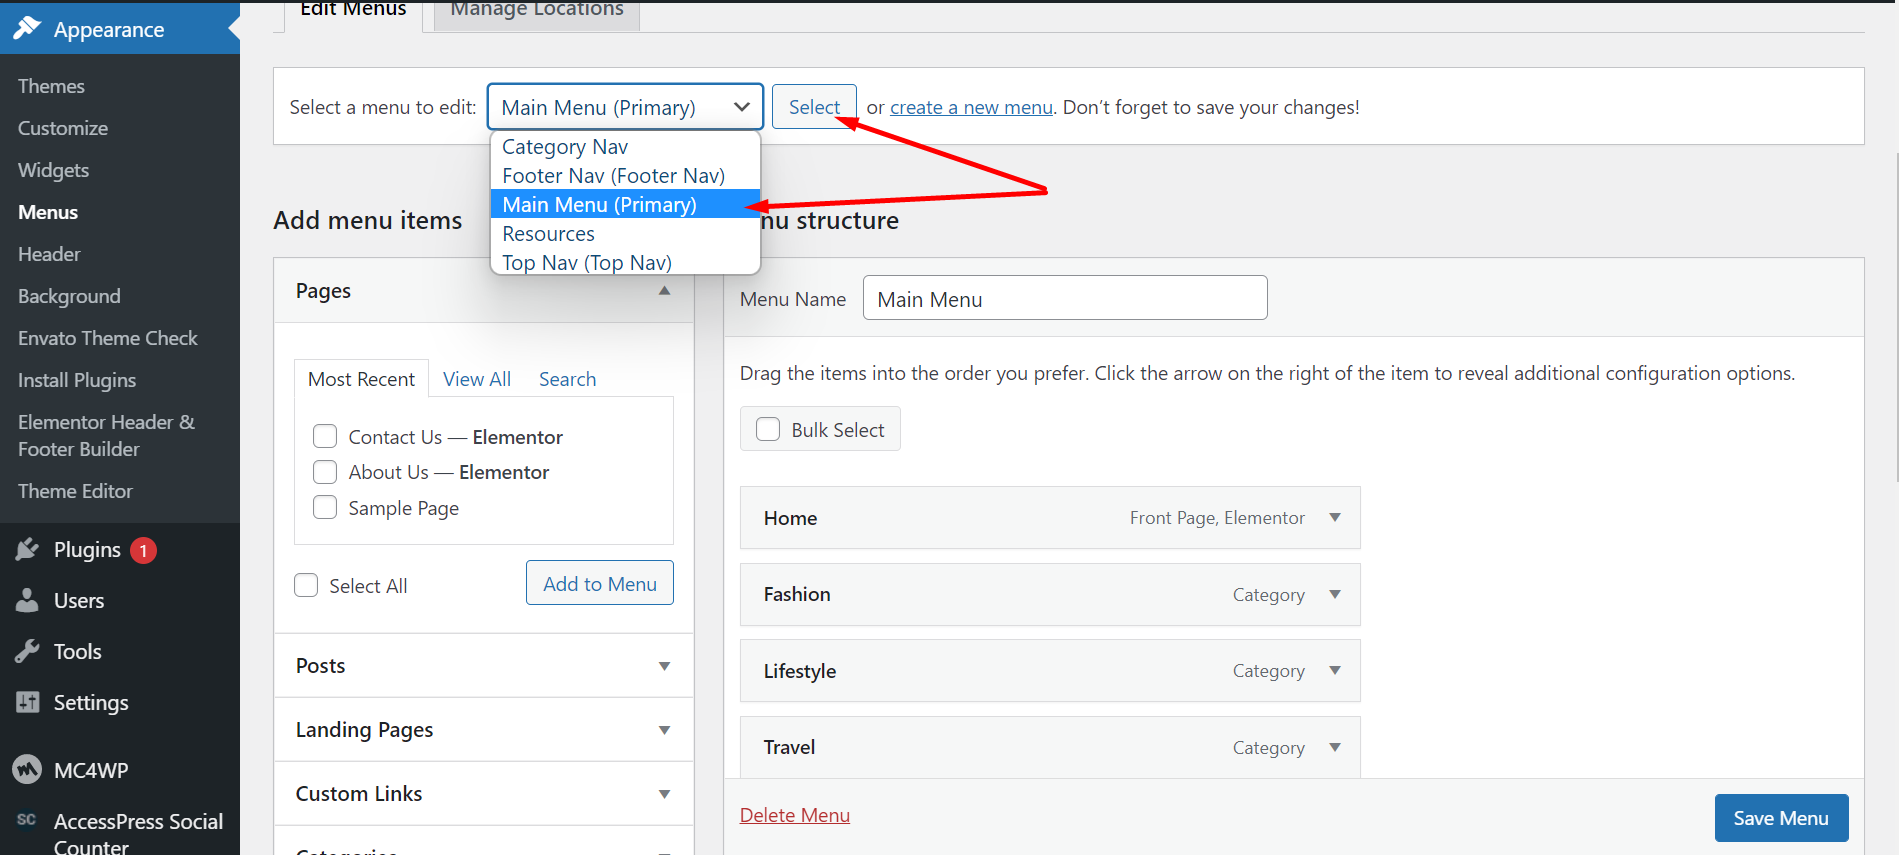
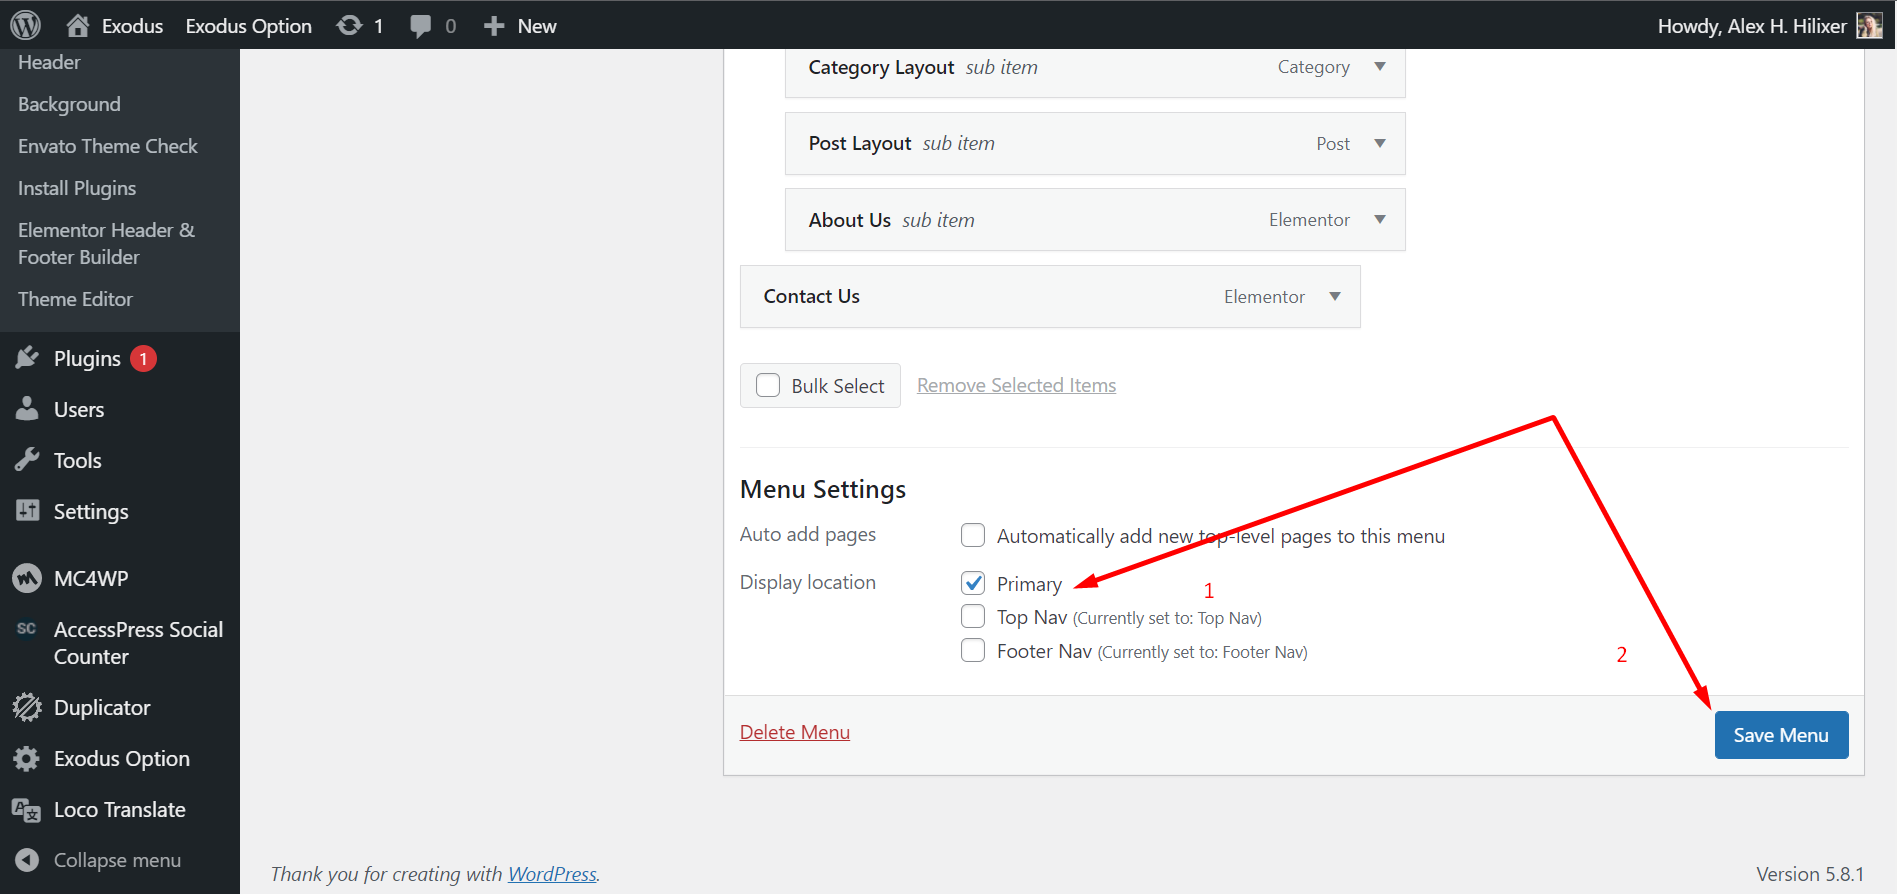
Navigate to Appearance → Menus
-
Then Check The Primary Check Box And last Hit The
Save Button
Theme Options - #back to top
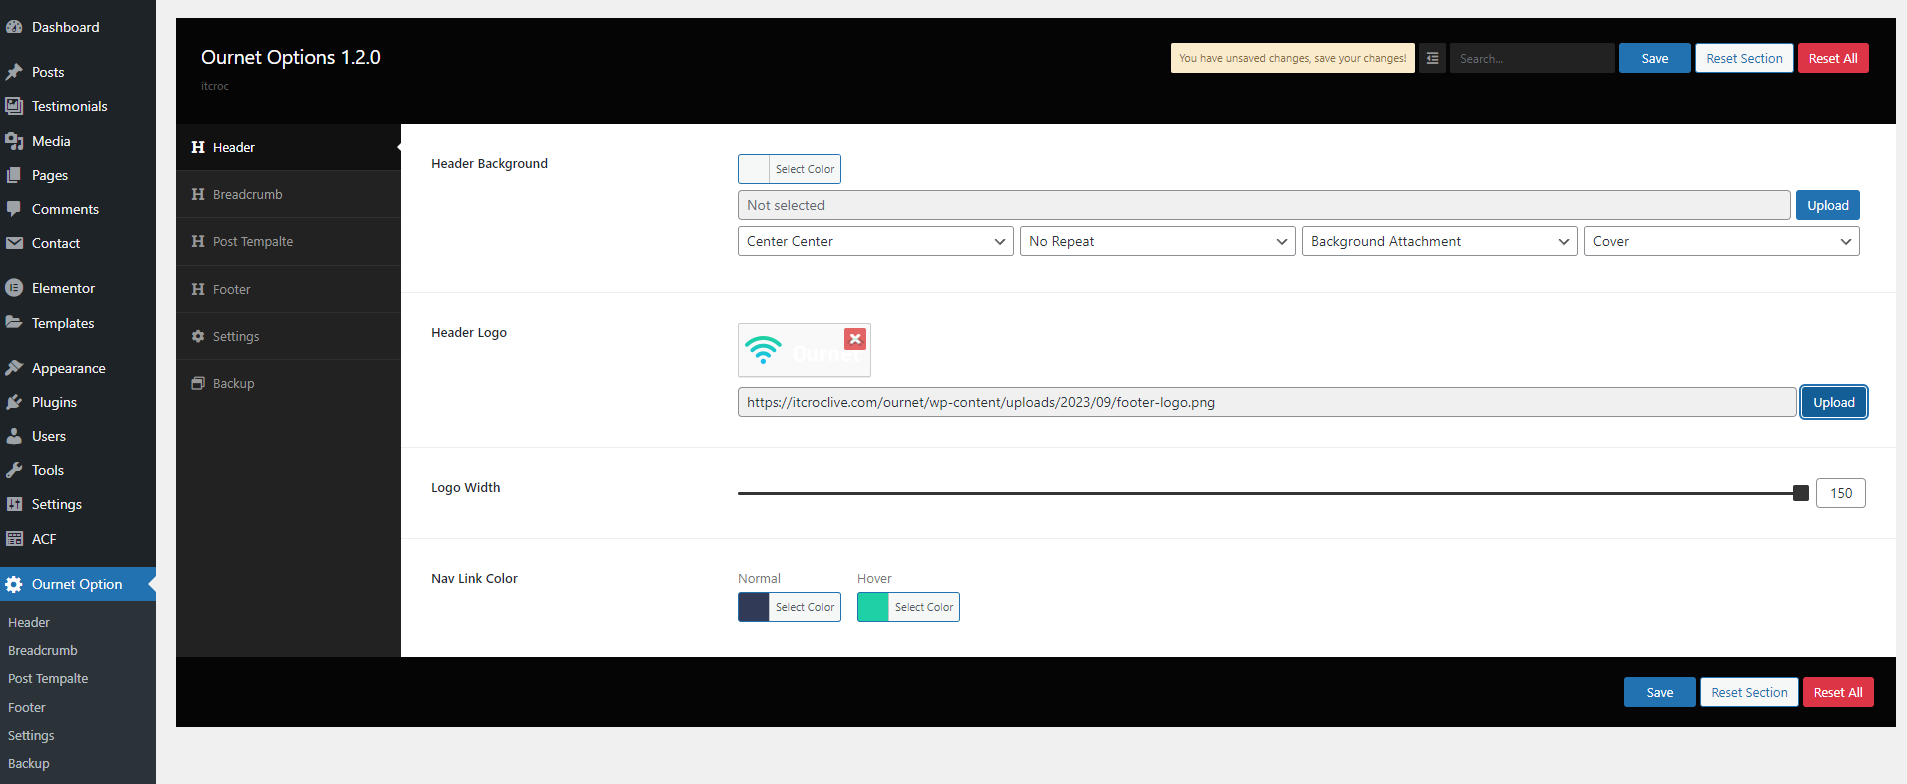
In your Wordpress admin dashboard, navigate to Ournet
Options
- 01 Header Option
- 02 Breadcrumb Option

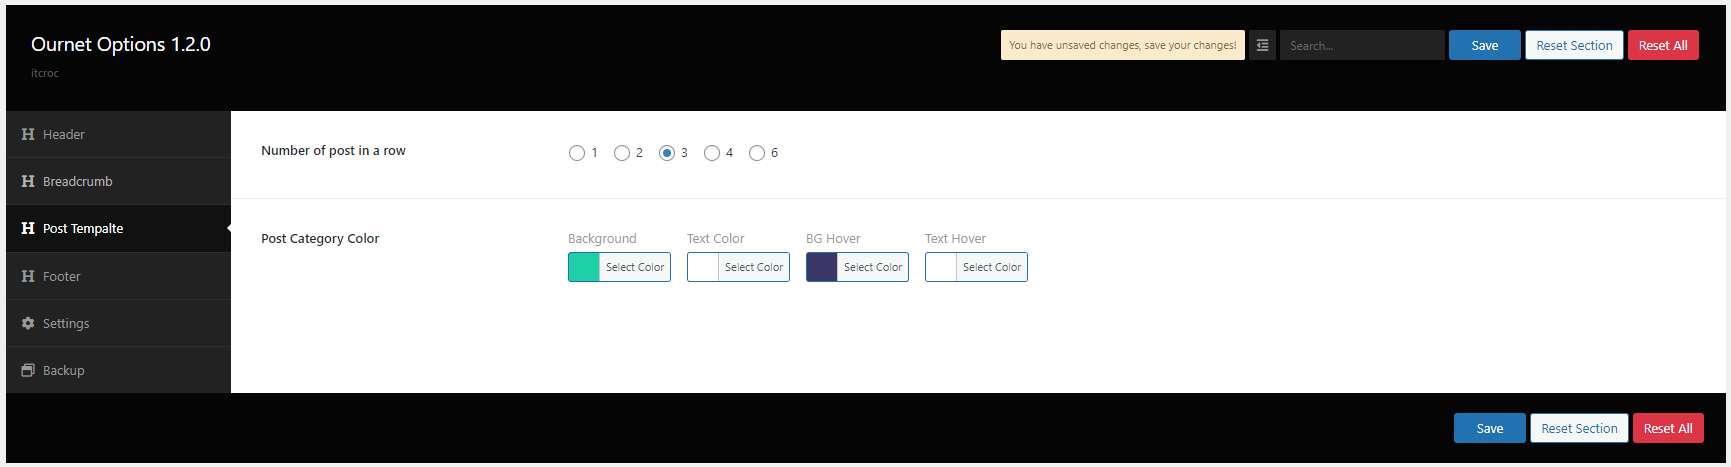
- 03 Post Template
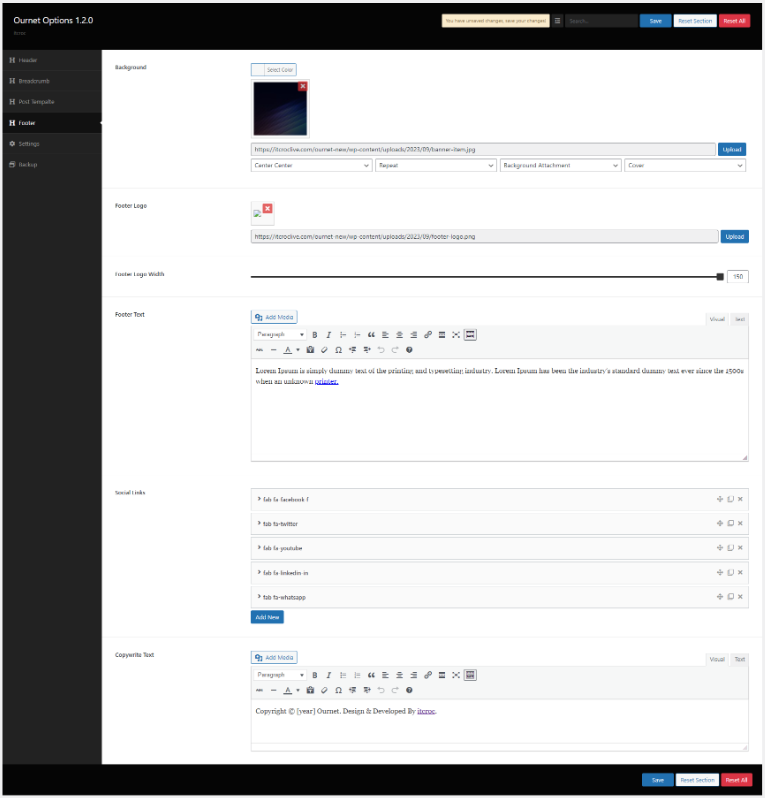
- 04 Footer Template you can Upload Footer Logo, footer social Icon, and footer copyright text
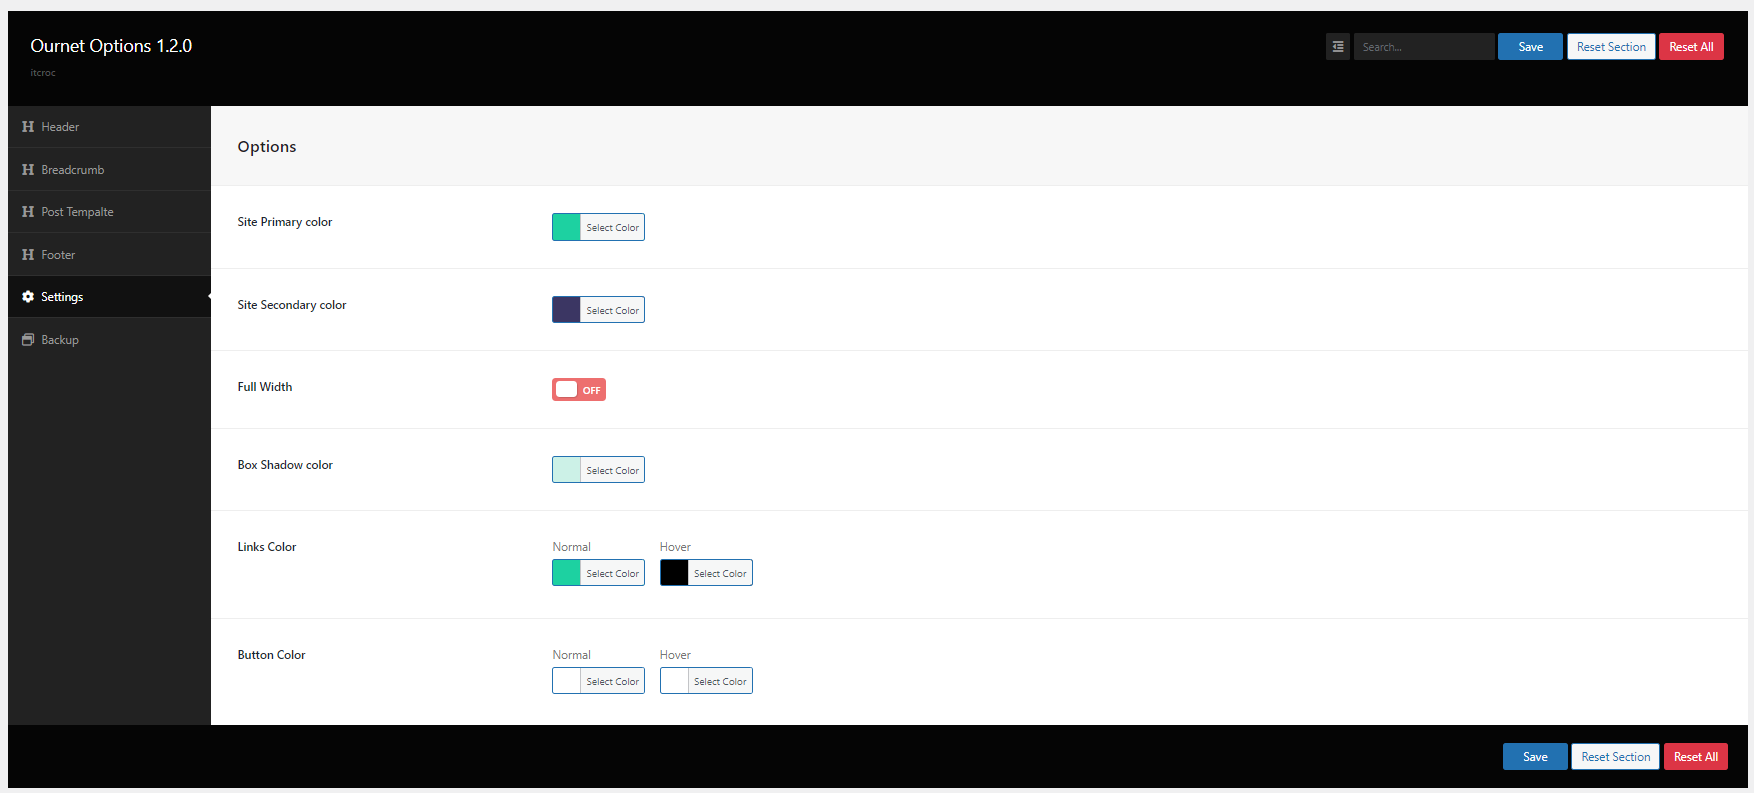
- 05 Settings you can change site color, width & other color
Logo Setup & Favicon icon - #back to top
In your Wordpress admin dashboard, navigate to Appearance → Customize → Site Identity → Logo.
Customize → Site Identity → Select Site Icon.
Updating Ournet - #back to top
When there's a new update available on Themeforest. Download the new updated theme. Then extract and upload new version from your dashboard Appearance → Themes.. Then activate the theme. During this process, your no website data will lost. Because all pages and posts data saves in Database.
Also after activating new theme, you needs to check that if there's any update available for Ournet Plugin as well by visiting this page Appearance → Install Plugins.
Support & Credits - #back to top
If you need any help Feel free to contact with us